On Saturday, I ran the Medvejie Half-Marathon.
Click the marker repeatedly! It is inspired by Warcraft 3. In the game, when you would select the character you wanted to make do something, it would have a standard response, if you did nothing but click the character over and over it would eventually give different responses, and it was like a little reward for persevering through repetitive clicking. The marker moves at the rate of 1 second = 1 minute. I want to put a stopwatch on top of the map so one could see the cumulative time. I don't know exactly how to do that though. There is something like it here https://www.mapbox.com/blog/playback-the-iditarod-with-turf/
So about the run, the weather was great and there was a good turn out. The run is officially called the Medvejie Solstice Run. There are three options of distances. You can run a 5k, 10k, or half-marathon. I signed up to do the Alpine Run this year, which is an intense run up Gavan Hill and around the ridge to Harbor Mountain. I signed up for the Medvejie half-marathon to make sure I'm on track with being in shape for the Alpine run. It was a fun run, so I'm glad I signed up.
You start at Herring Cove trailhead and from there you go along the service road that is closed to public and only for people working at the Medvejie Hatchery or at the Green Lake dam. Hikers often take this road on foot or bicycle to access Bear Mountain trails, Medvejie Lake trail, and a couple of other trails. When we crossed the island we avoided the long walk/bike down this road by getting a boat ride directly to Medvejie Hatchery.
The race continues on this hilly, dirt road until reaching the very very end of the road at the Green Lake dam. You cannot see the dam or the lake from this end of the road. And then you turn around and head back.
My time was 1:48. My best mile was the 11th mile at 7'48". These were my splits.
Wednesday, June 17, 2015
Saturday, June 6, 2015
3D Models
I think I've learned a new way to share 3D models, but I haven't perfected it.
I modeled my fedora with Autodesk's free app and program 123D Catch. You can use it on your iPhone or Android or you can upload photos through their website. It takes the photos and creates a 3D model. The 3D mesh often has errors but I use it as a base and then 3D model around it. I used Blender.
This fedora came from Cuba, a trip in March of 2014.
Here is the 3D model:
I modeled my fedora with Autodesk's free app and program 123D Catch. You can use it on your iPhone or Android or you can upload photos through their website. It takes the photos and creates a 3D model. The 3D mesh often has errors but I use it as a base and then 3D model around it. I used Blender.
This fedora came from Cuba, a trip in March of 2014.
Here is the 3D model:
Crossing the Island
Ellen, Jasmine, and I crossed the island. I learned how to embed maps so here is a map!
EDIT: I've removed the line that was our path from the map. The reason is that there have been people attempting this hike without being fully prepared and had to get rescued, the same party involved, on multiple occasions. The chance of someone finding my map and using it as a guide without preparing in full is slim, but there is that possibility. And I have had a co-worker stumble upon this blog just by Googling 'kayaking alaska', so I wouldn't want someone to find my map and attempt the hike without talking to someone in person about it first. There will be a fully interactive map and story soon.
The faint white line is our flight path on the return. The pilot was taking us straight across the island but we hit a wall of clouds before reaching the other side of the island and then he took us north to the very tip of Baranof.
The blue line that you'll find on Baranof Lake is our path when we were canoeing on the lake. I should say when Jasmine and Ellen were canoeing, I was just sitting there trying to check-in on my phone. Haha. Also, I was trying to stay warm. There were only 2 paddles so I didn't have much of a choice. Although, it did feel like King day all over again.
Soon, I plan on adding images to this map. Ellen, Jasmine, and I will first have to share pictures and that hasn't happened yet.
EDIT: I've removed the line that was our path from the map. The reason is that there have been people attempting this hike without being fully prepared and had to get rescued, the same party involved, on multiple occasions. The chance of someone finding my map and using it as a guide without preparing in full is slim, but there is that possibility. And I have had a co-worker stumble upon this blog just by Googling 'kayaking alaska', so I wouldn't want someone to find my map and attempt the hike without talking to someone in person about it first. There will be a fully interactive map and story soon.
The faint white line is our flight path on the return. The pilot was taking us straight across the island but we hit a wall of clouds before reaching the other side of the island and then he took us north to the very tip of Baranof.
The blue line that you'll find on Baranof Lake is our path when we were canoeing on the lake. I should say when Jasmine and Ellen were canoeing, I was just sitting there trying to check-in on my phone. Haha. Also, I was trying to stay warm. There were only 2 paddles so I didn't have much of a choice. Although, it did feel like King day all over again.
Soon, I plan on adding images to this map. Ellen, Jasmine, and I will first have to share pictures and that hasn't happened yet.
Sunday, September 14, 2014
Four years later: I saw Denali
Four years after my trip to Denali national park, I revisited and this time i saw The Tall One!
I am satisfied.
My friend that lives in Fairbanks but used to live in Sitka won the car lottery. A select number of people are given permits to drive into the park where normally vehicles are prohibited and access is limited to buses.
As the day progressed and we got farther into the park, the weather got better and we were cheering on Denali to show its face.
We saw one bear really close, we saw some dall sheep from a distance, and we saw a moose at the very end of the day. I had to look again at my old photos from 2010 and I was surprised to see how green it was that time of the year.
I've been using this new app called Hyperlapse, so please enjoy the videos below.
Thursday, July 17, 2014
Two years later
I'm pretty bad at keeping a blog, but that's all I have to say about that!
Updates on the kayak:
Last summer I fiberglassed it inside and out:

Updates on the kayak:
Last summer I fiberglassed it inside and out:
Also, I again had to move it from the place I was working on it because I was too optimistic about the time schedule and my availability. I moved the shell of the boat first in the daytime. And I had moved the frame outside of the building so I could move it whenever was a good time. Well, I was dishwashing some nights (in addition to my day job) and after a night of dishwashing it felt like the right time to go and move my kayak frame. Not long after I took the picture shown above, the cops stopped me on the bridge, made me set the kayak frame down and questioned me if I had been drinking, if I had broken in somewhere. I was laughing but they did not find any of it funny. I shared the picture of the newspaper with my family and they thought I was maybe the guy sleeping in the 200 block of Katlian so I had to blur out everything else.
Okay, that's my kayak update!
I'd update more but then I would probably never finish this post. So last thing is, I have a Flickr account. I've lost photos before when I thought I was backing them up and on Flickr you can upload 1 Terabyte of photos for free! So check it out if you want, I keep it updated sorta regularly.
Friday, March 9, 2012
Sitka to Glacier Bay: Kayak Trip Pt 1
Ellen
Leader & Whale Whisperer
Element: Earth
Events Coordinator & Yoga Master (and a bear)
Element: Wind
Leader & Whale Whisperer
Element: Earth
Julien
Artist & Big Eater
Element: Water
JasmineEvents Coordinator & Yoga Master (and a bear)
Element: Wind
Joshua
Maniac
Element: Fire
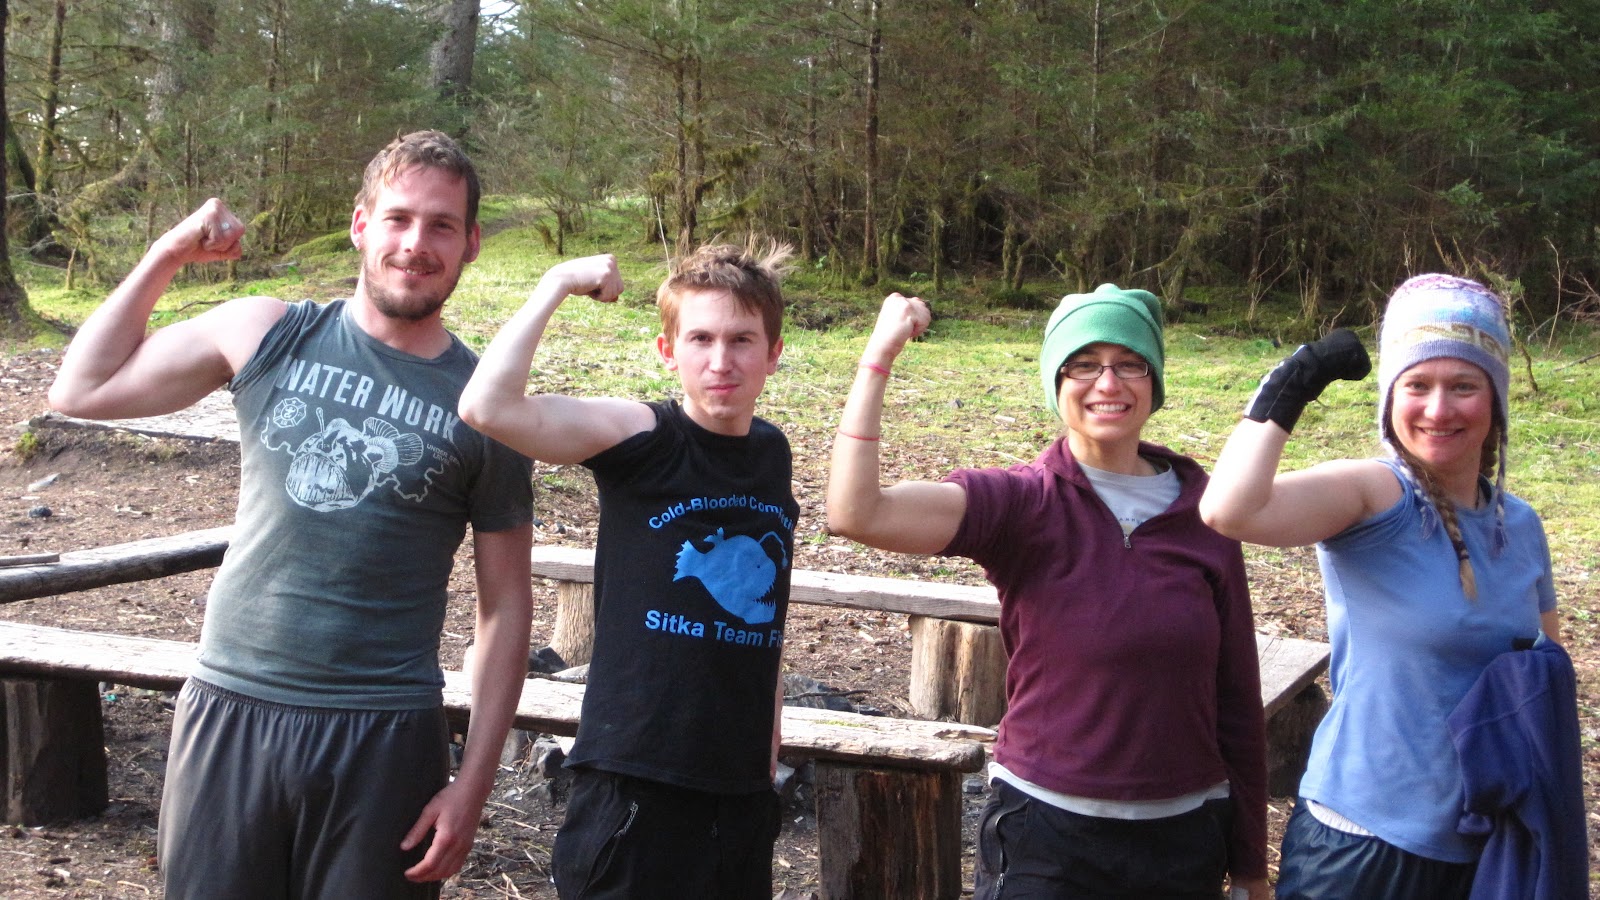
We took bicep pictures so we could have a before and after. The first day the four of us were not together. Ellen and Jasmine were the ones that were ready to go; Julien and I still had some things to pack up. I hadn't finished my kayak (as you know) so I ended up borrowing my friend Paul's, who is Julien's brother. Julien was in town visiting from Paris, France. While he was in town he made tons of amazing art.
On May 7th, Ellen and Jasmine left for Kruzof Island. Kruzof is the big island 7 miles West of Baranof Island and is home to Mt. Edgecumbe, the volcano that is pictured at the top of this blog. 7 miles is actually from where the two islands are closest, Ellen and Jasmine left from Totem Park which is about 12 miles from the coast of Kruzof.
As they paddled, Julien and I finished up our things. I had to move out of my apartment. I was living in an apartment that is used for church volunteers. I played the organ for church and was doing so voluntarily so I qualified. However, there are summer volunteers that come up to Sitka and stay about 2 weeks and make the church welcome to tourists Monday through Friday. Those volunteers needed a place to stay so I had to vacate! I moved all my belongings into the career center where I had an office or two.
Ellen and Jasmine made it Kruzof. We heard that much from them. We tried to keep cell phone use limited since there were no more opportunities to charge them. Julien and I left for the Chaichei Islands. We left from a spot closer to Kruzof than the girls and the Chaichei Islands are about 3/8 of the way there so we had a nice little early evening paddle.
I fulfilled a goal on the Chaichei Islands. I drank Chai Tea while doing Tai Chi on the Chaicheis. I had talked about it and I was able to fulfill it on the trip. However, I sorta pretended to do Tai Chi.
Here is Julien with Kruzof and Mt. Edgecumbe in all its glory as the background. The blanket of clouds is my favorite part.
Labels:
Chai Tea,
Chaichei Islands,
Kayak Trip,
Mt. Edgecumbe,
Tai Chi
Monday, February 27, 2012
Resurrecting the blog
Hi. Please bear with me while I try to start blogging again. I was blogging a bunch and then I didn't finish the kayak and then I went kayaking and then I stopped blogging.
This is the kayak as it looked on the 10th of September 2011. I put a coat of epoxy on the deck. Then storms came and I covered it with a tarp but the storms were strong and I was at work and then I had to do some repairs to the ends. Now it's stored for a while.
My summer was a lot of biking and hiking. And I lived with a piano and I played a lot of piano.
These are my favorite photos from this last summer:
And I still need to actually do a post covering the kayak trip.
Wednesday, July 13, 2011
Coming soon
A post featuring pictures and stories from the Sitka to Glacier Bay kayak trip soon to come. In the meantime, here are a few pictures.


Saturday, May 7, 2011
Gone Kayaking
Hi. Today I am leaving on a kayaking trip with 3 other friends. I was hoping to finish building my kayak and even have time to test it out but things just didn't go as quickly as a procrastinating optimist would expect them to. So... I was approaching the fiberglass step, I got all ready for it... but then it was clear that I would be late and left behind from the trip. After the trip I will go visit family in Idaho and see my sister get married. Then I will return to Sitka, find some kind of job and finish the kayak.
Ttyl!
Tuesday, May 3, 2011
Tuesday, April 26, 2011
Sunday, April 24, 2011
Wednesday, April 20, 2011
Tuesday, April 19, 2011
Deck coming up
Yesterday was productive, and I even finished my taxes yesterday. I'm getting much more efficient. Today I am hoping to be productive, too.
Monday, April 18, 2011
More bottom
The two strips down the middle of the bottom were the hardest to prepare. The other hardest spot is the little ones closing in the gap. I actually steamed one of the strips to get it to bend.
Monday, April 11, 2011
Getting close to the bottom
It's difficult getting some of these strips on! I'm getting close to the bottom part though, then I'll get to work on the deck. I'm getting better but it takes a lot of my patience.
The hard part is getting the strip to twist and getting it to lay against the forms. Even when using staples and/or a finish nail it is hard to get it to go in place. When you think you've got one spot secure and you go to work down the rest of the strip the beginning spot will come undone!
Thursday, April 7, 2011
April 07 - 7 Strips
I got a late start today, but I'm planning on getting quite a bit done. I'm hoping the speed will pick up too. =)
Wednesday, April 6, 2011
April 06 - 4 Strips On
The sheer line strips were the toughest. I managed to get them to follow the sharp curve at the ends. While putting on the next strips the first ones kept popping out, that was pretty frustrating. I substituted this afternoon at the alternative school. I managed to get something done though. I will try to do two more tonight, I've got a social event though first.
Long Time A Comin'
I've finally finished all the prep work and have begun putting the kayak together. Lots of things had to be done before I even started building the kayak.
At Dan's house I borrowed some of his tools and he helped me get set up. I cut the planks into 3/8" strips on the table saw.
Then, Dan and I were running the strips through the planer and it broke, the rollers were jammed and nothing was getting through. So I took it in hopes of fixing it.
The strips sat awhile. I took the planer apart, found the broken sprocket, it looked porous so I thought I'd give it a shot and super-glue it. One board went through, but then it broke on the second one. Online the specific sprocket was back-ordered till April. A couple weeks went by and my friend Greg, a construction professor over at UAS, offered to help and said I could use the planer at the university. Three days of planing in between 3:30 and 5:00 pm then I had 192 1/4" thick Western Red Cedar strips at twelve feet long and 3/4" wide.
The next step was to put a bead and cove on them.
I had my router bits all ready.
So with the router bits, and thanks to Uncle Doug - a nice router, and thanks to Dan - a router table, and two days of full-on routering my strips were ready.
The two sheer strips went on the other day. Now I finally feel like the kayak is being built. I'm going to post a picture everyday to show progress because hopefully it goes really quickly now.
In this post I would like to thank Karen for the place to work, Doug for the router, Dan for the use of the table saw, router table, planer, help with doing some of the work and a couple of tools that I borrowed, Jasper for the tools I've borrowed, and Greg for letting me use the planer at the university and help transporting the strips.
At Dan's house I borrowed some of his tools and he helped me get set up. I cut the planks into 3/8" strips on the table saw.
Then, Dan and I were running the strips through the planer and it broke, the rollers were jammed and nothing was getting through. So I took it in hopes of fixing it.

The strips sat awhile. I took the planer apart, found the broken sprocket, it looked porous so I thought I'd give it a shot and super-glue it. One board went through, but then it broke on the second one. Online the specific sprocket was back-ordered till April. A couple weeks went by and my friend Greg, a construction professor over at UAS, offered to help and said I could use the planer at the university. Three days of planing in between 3:30 and 5:00 pm then I had 192 1/4" thick Western Red Cedar strips at twelve feet long and 3/4" wide.
The next step was to put a bead and cove on them.
I had my router bits all ready.
So with the router bits, and thanks to Uncle Doug - a nice router, and thanks to Dan - a router table, and two days of full-on routering my strips were ready.
This is the router table setup. The featherboards make the job very easy. The strip has no way to stray or kick-back.
Then I had a few things to do to get the forms lined up and secured. And there's tape that goes around any spot where glue might adhere the strips to the forms. You don't want it to be too difficult to get the kayak and the forms separated.Getting everything lined up properly proved to be much more difficult than I anticipated also.
The two sheer strips went on the other day. Now I finally feel like the kayak is being built. I'm going to post a picture everyday to show progress because hopefully it goes really quickly now.
In this post I would like to thank Karen for the place to work, Doug for the router, Dan for the use of the table saw, router table, planer, help with doing some of the work and a couple of tools that I borrowed, Jasper for the tools I've borrowed, and Greg for letting me use the planer at the university and help transporting the strips.
Subscribe to:
Posts (Atom)